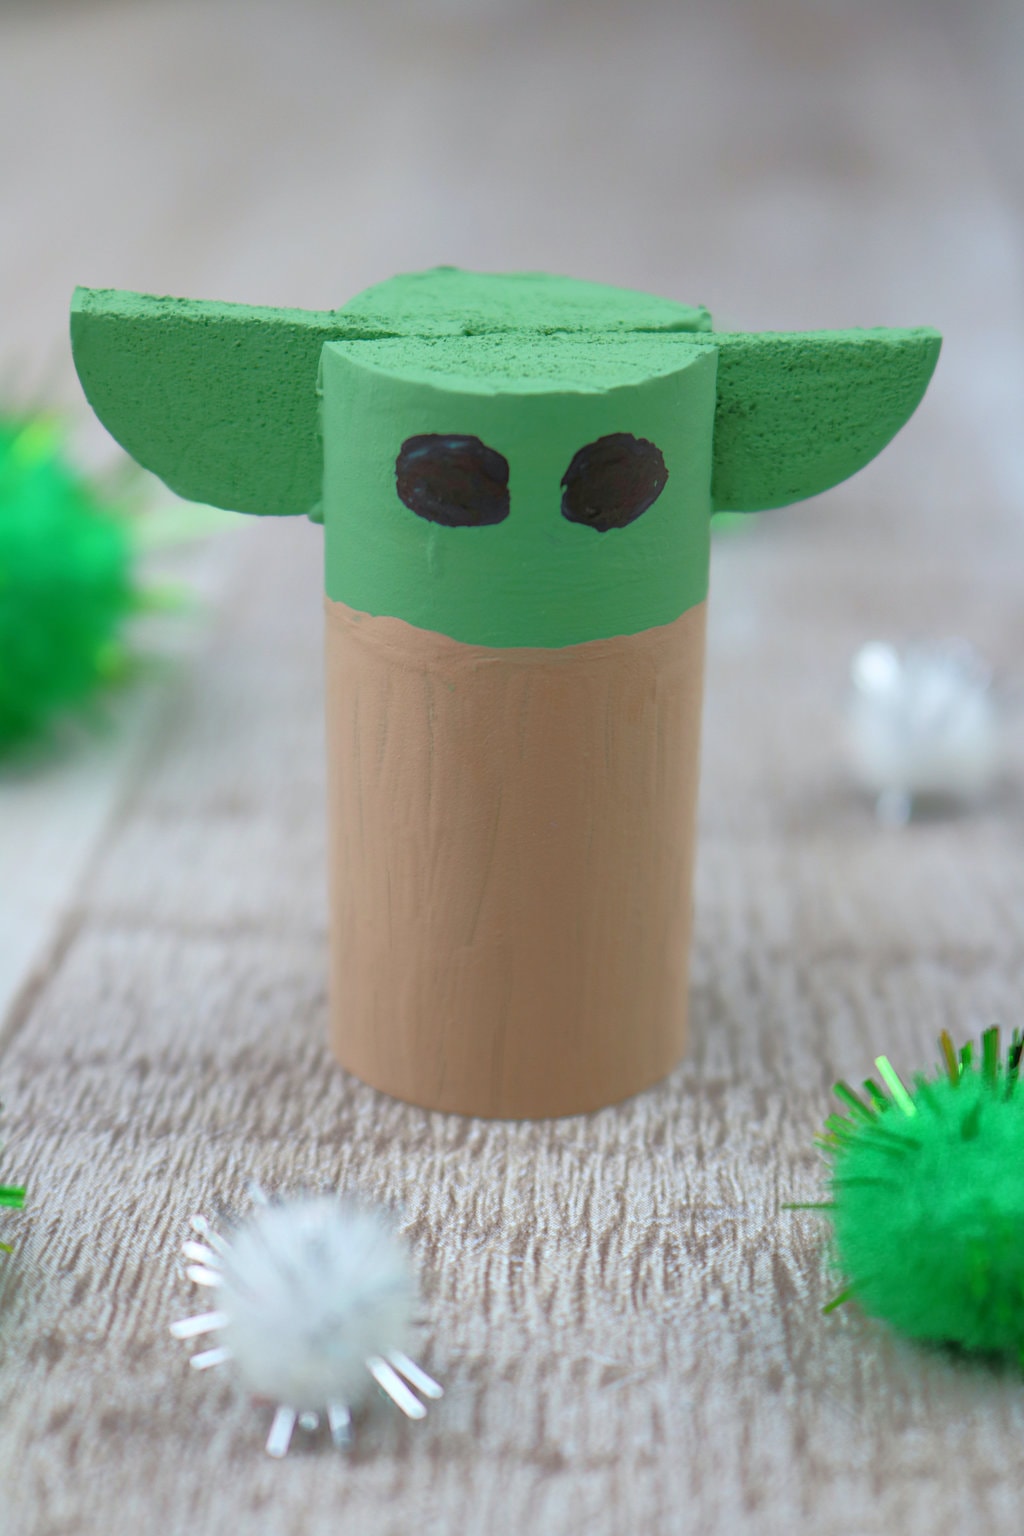
Yoda and Baby Yoda are some of my favorite characters from Star Wars. How can you not like the wise Jedi Master?
This easy DIY Yoda craft makes a cute tiny character that can be tucked onto a shelf or put in a Star Wars display.
Be sure to see our easy Yoda Souvenir Pocket DIY, too!
You might also like these Star Wars crafts and recipes:
How to Make a Yoda
Supplies
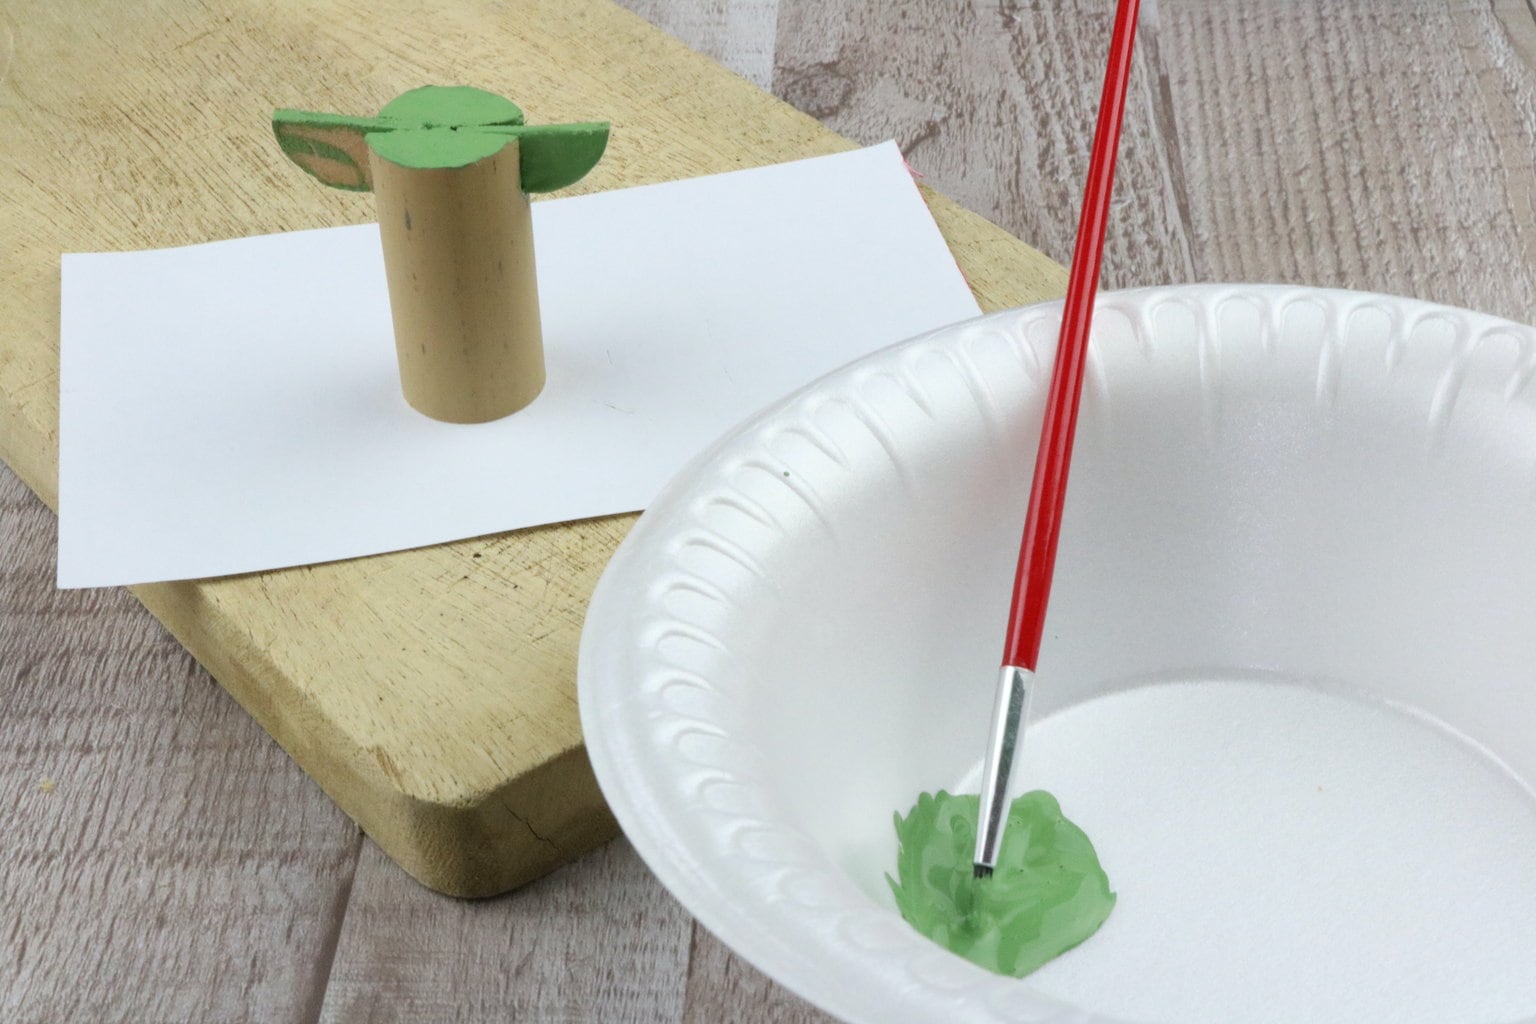
- 1 Cork (can be real cork or faux cork like I used)
- Hot Glue Gun & Glue
- Cutting Board
- Acrylic Paints in Brown, White and Green
- Black paint or permanent black marker
- Paint Brush
- X-Acto Knife
Directions
Step 1
Cut off a thin layer of the cork.
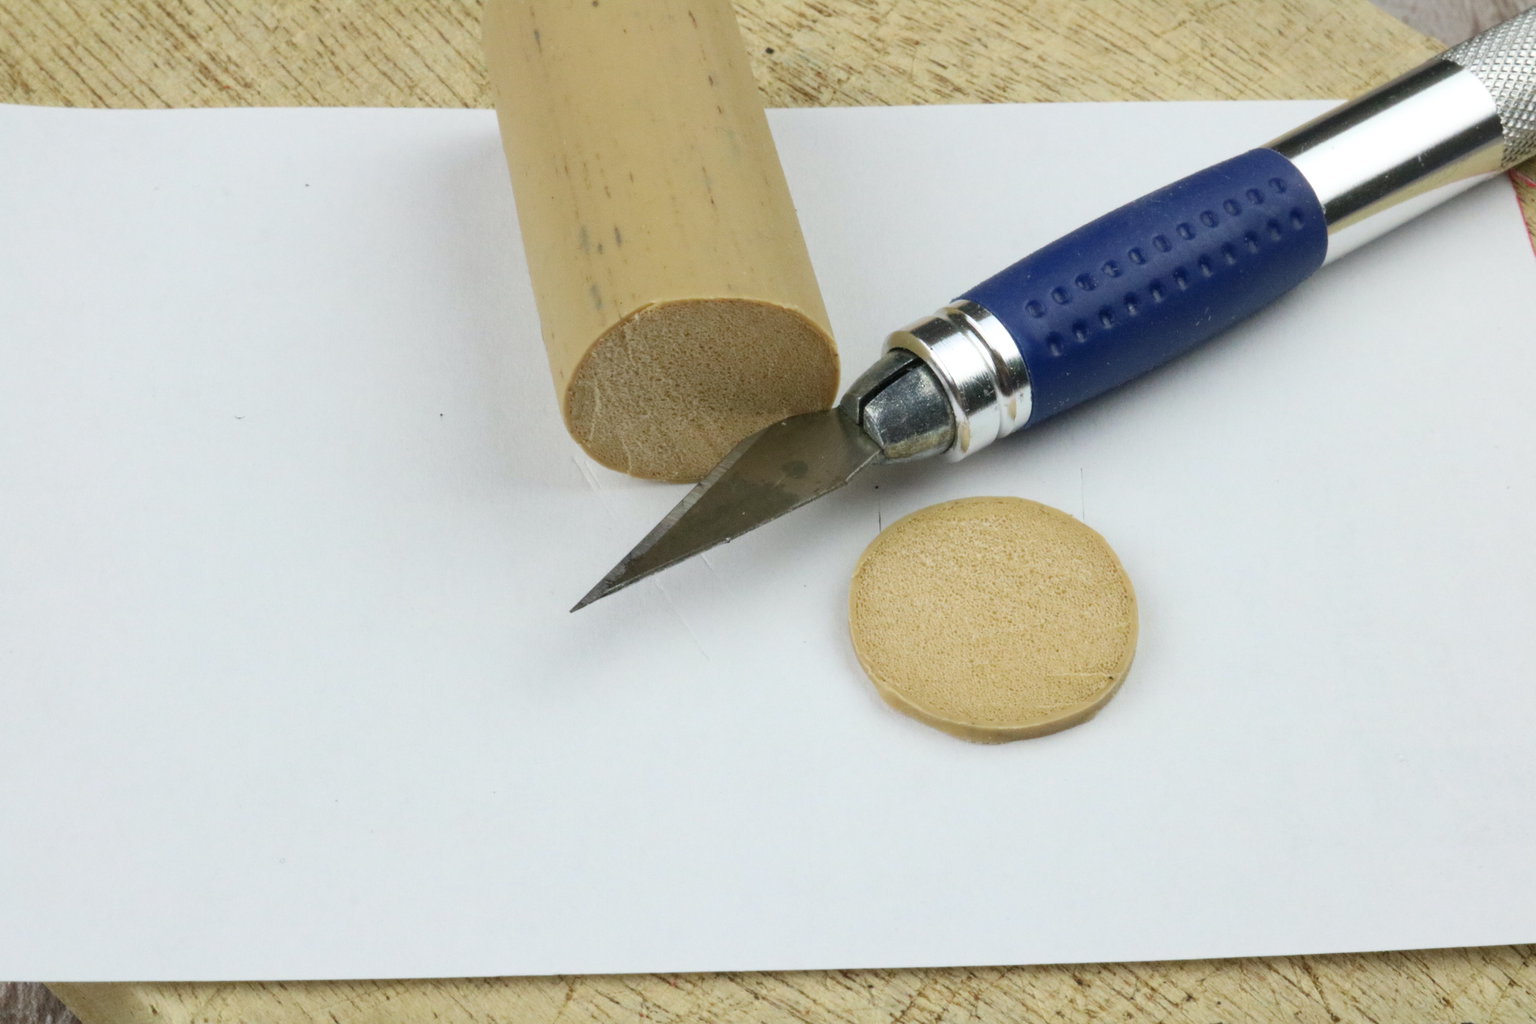
Then cut that thin layer in half.

Step 2
On the top of the cork, cut out a small wedge-shaped piece. You want the space to be large enough to put that half-cut layer inside so that it is flush with the top of the cork.
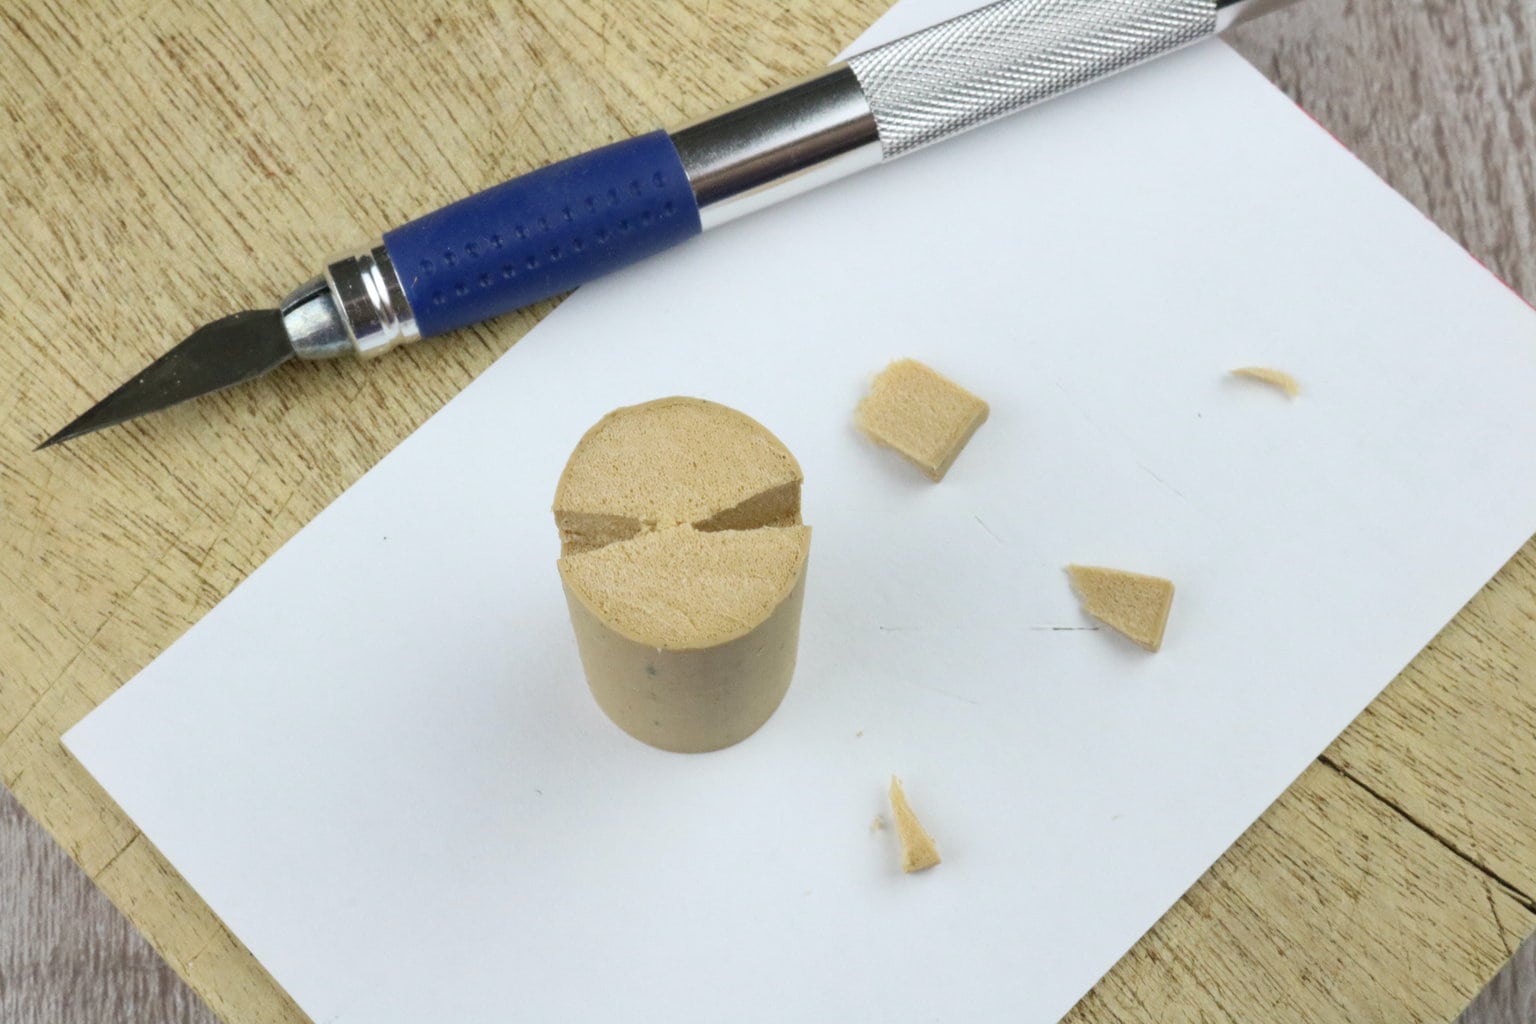
Do this on both sides to make two wedge shaped cuts.
Step 3
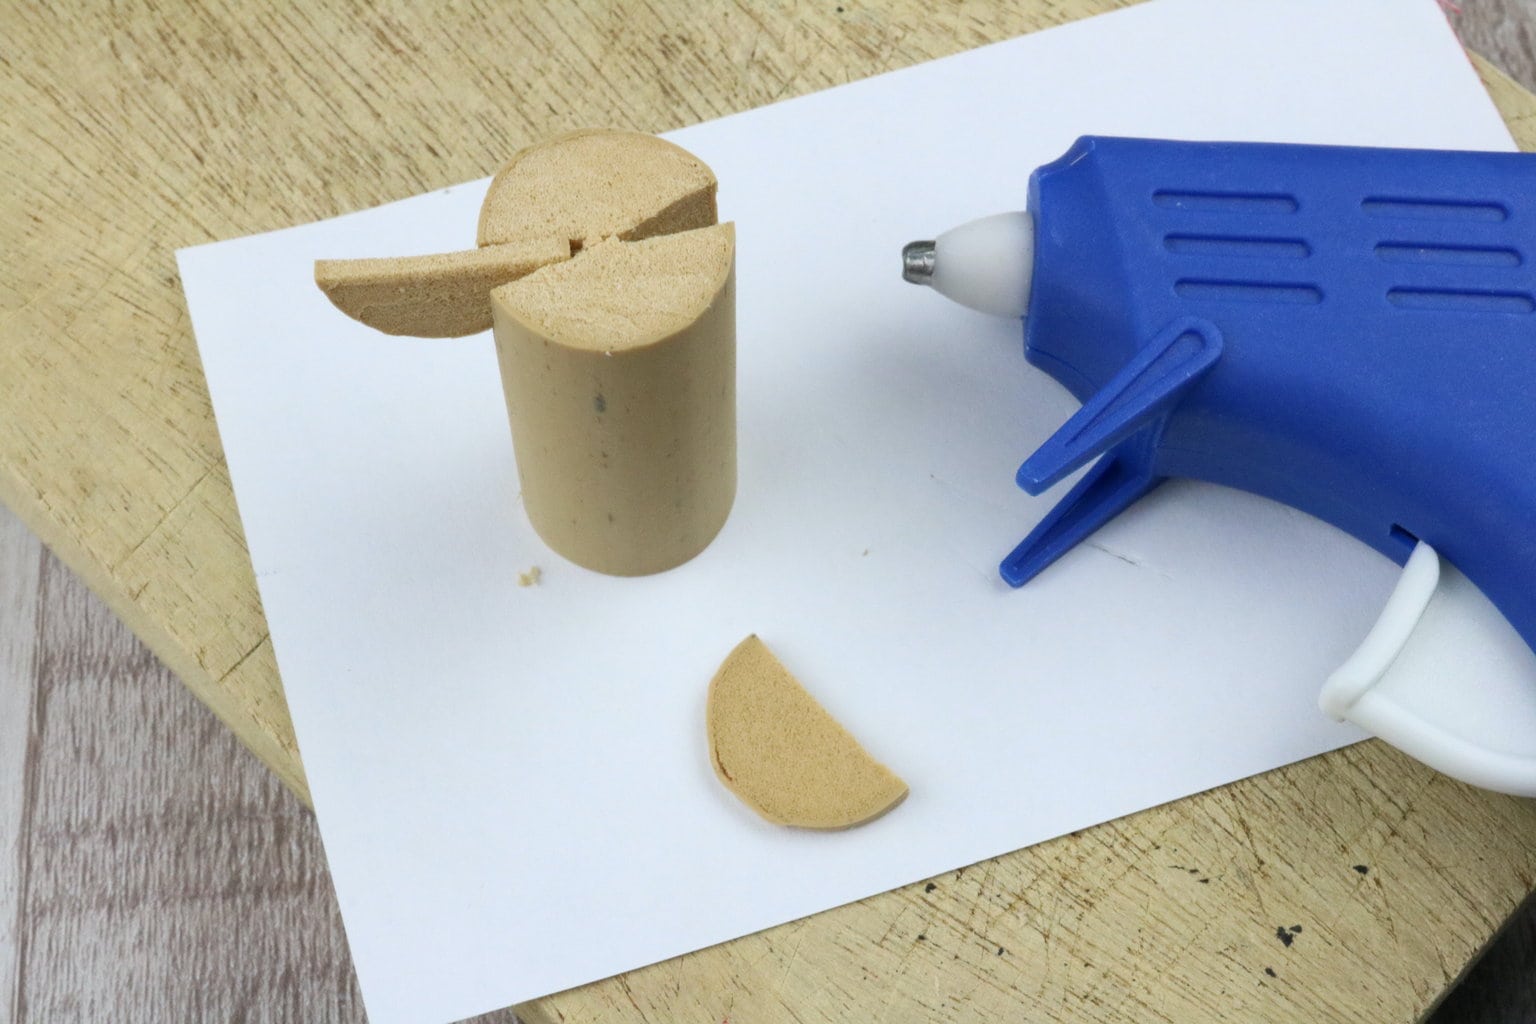
Using the hot glue gun, glue those half-cut pieces into the wedge cut outs with the rounded side of the pieces facing down.
Step 4
Mix a little green paint with a small bit of white paint to get a lighter green (unless you can find a bottle of the perfect Yoda-color green paint!).
Paint the top of the cork and then a strip of paint that goes about 1/4 way down the cork.
Make sure to paint the half circles (the ears) that are glued in place.
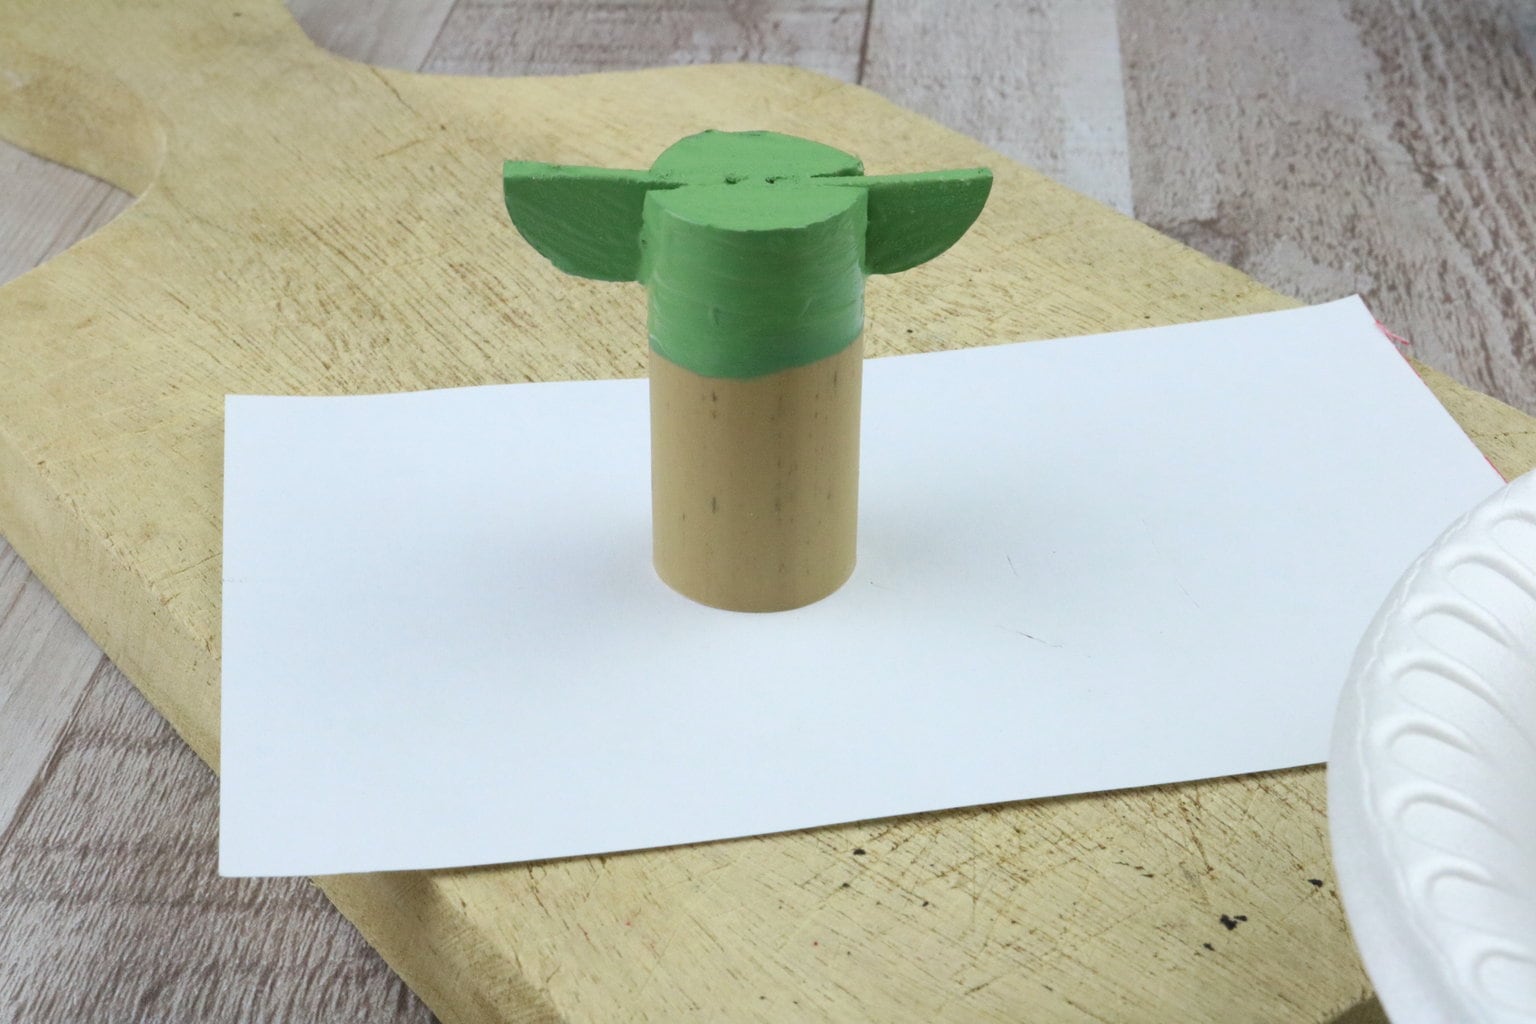
Depending on the type of cork, you may need to do two layers of paint because cork can really soak up the paint. If so, then allow to dry and paint a second coat.
Step 5
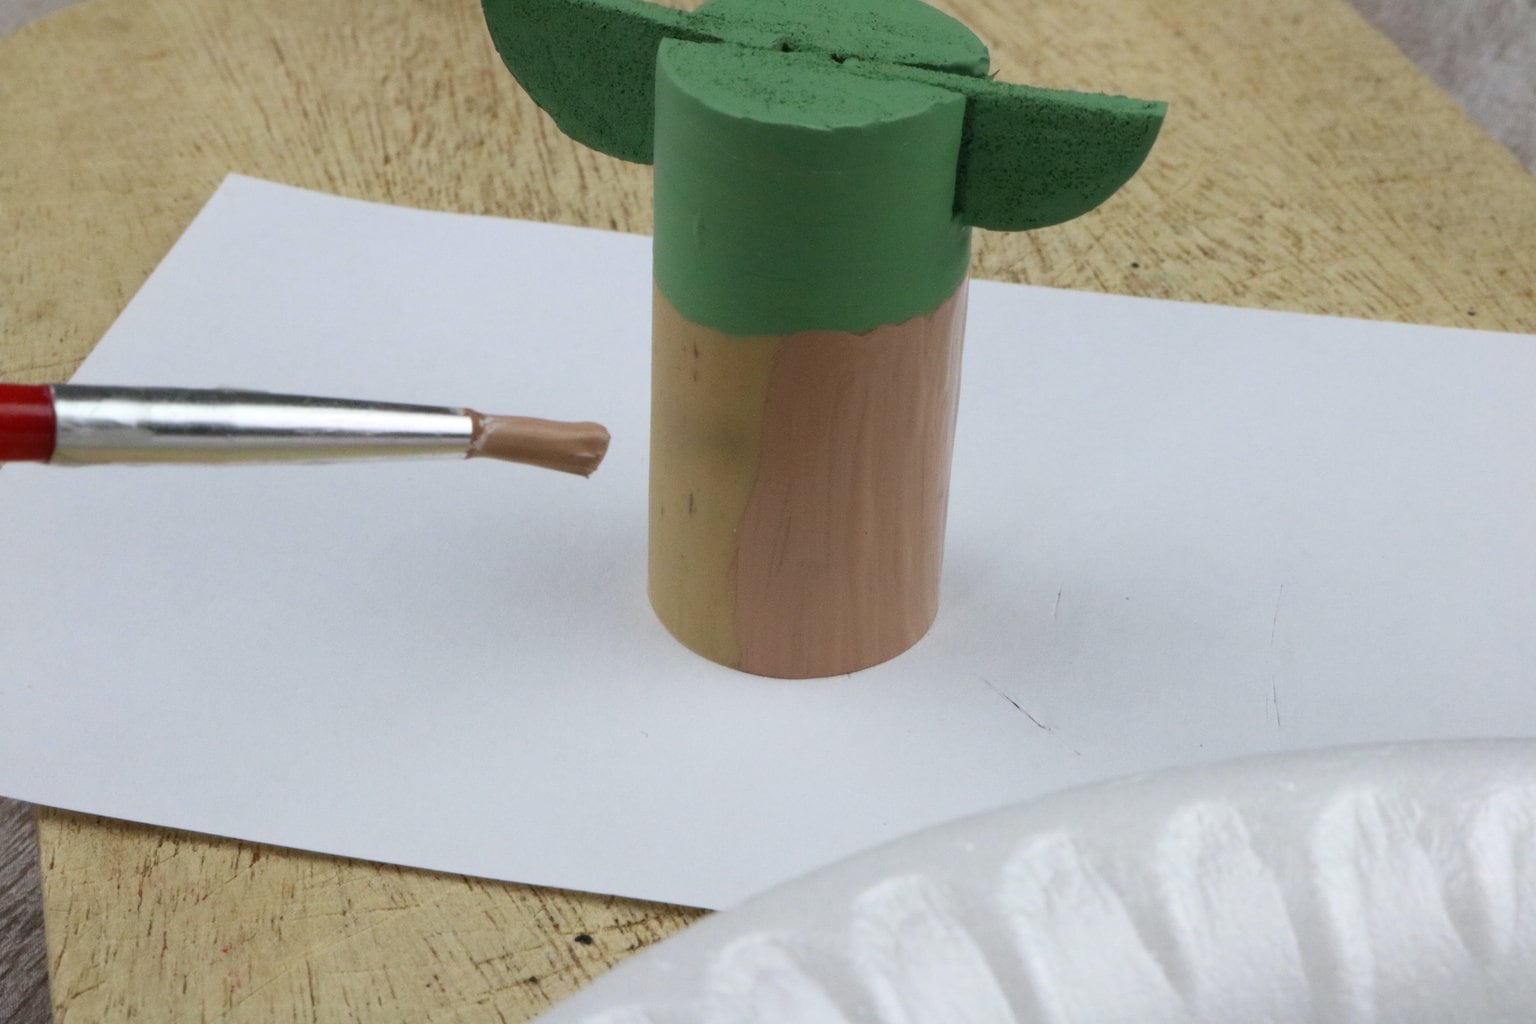
Mix a little brown with a little white paint to make a tan color.
Then paint the bottom of the cork under the green. Make sure to paint all the way around the cork with the tan color.
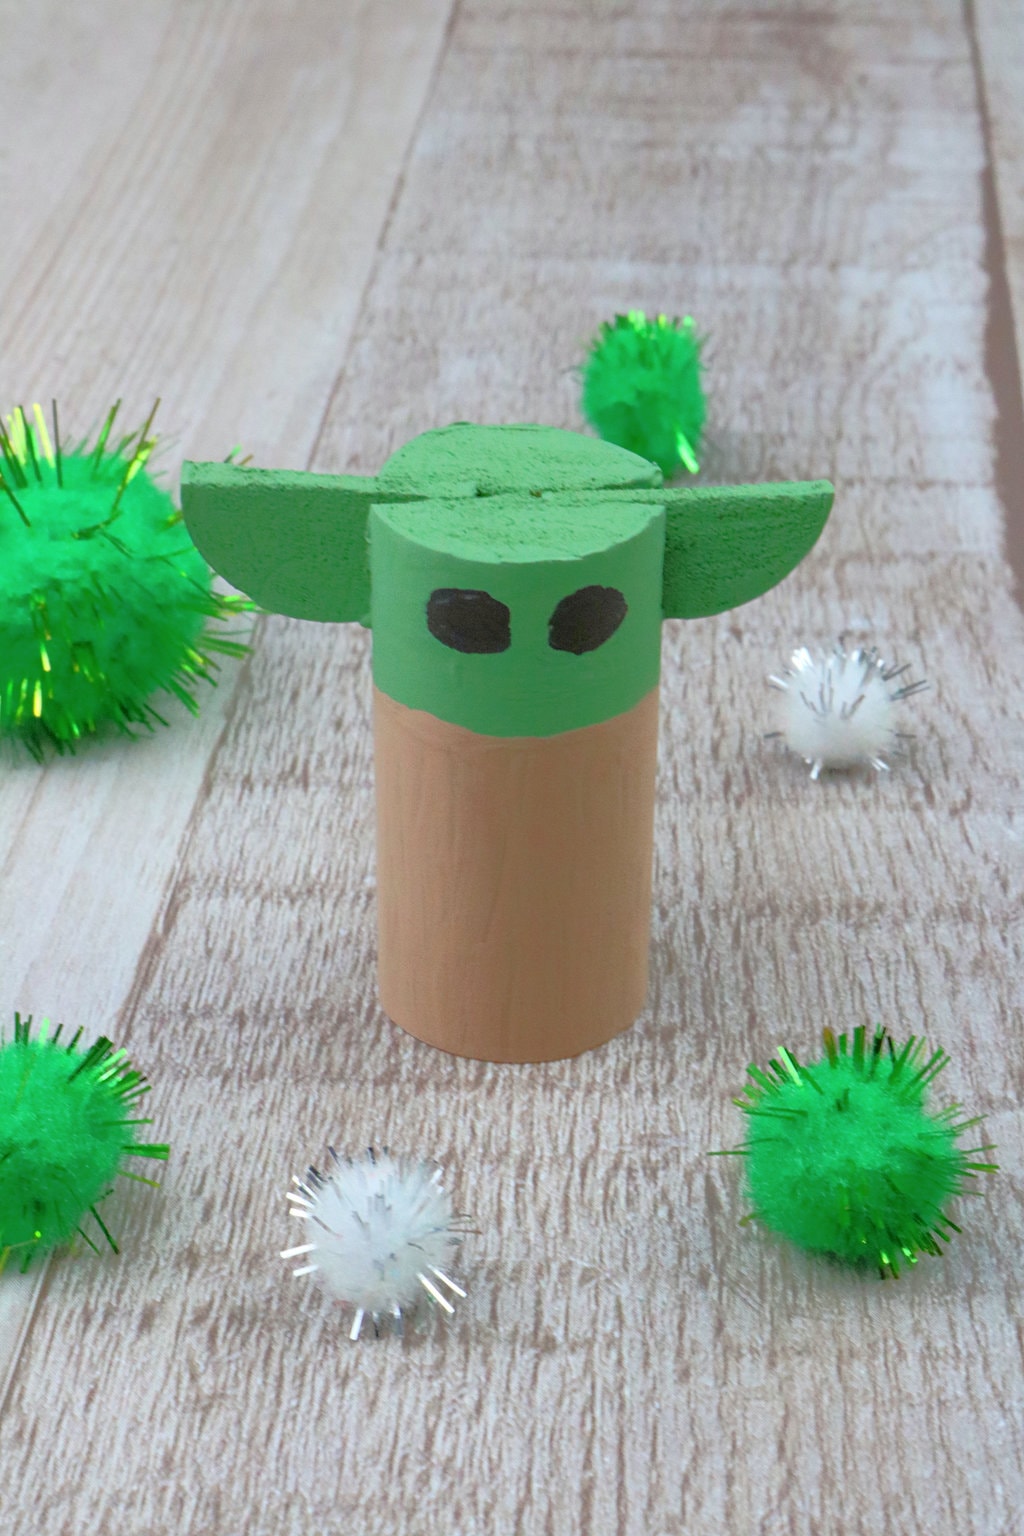
Using black paint or a black permanent marker, paint two small dots on one side of the green area to make the eyes.