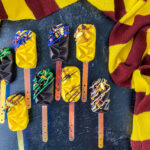
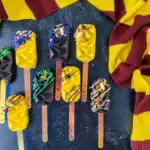
If you want small bite-size treats for a wizarding party that aren’t traditional cupcakes or cake, these Harry Potter cakesicles are perfect! Decorate them in Hogwarts House colors for muggles of all ages to enjoy.

For easy party planning, be sure to see all of our Harry Potter party recipe ideas:
- Easy Butterbeer Recipe
- Butterbeer cupcakes
- Sorting Hat Cookies
- Harry Potter Broomsticks
- Hot Butterbeer

How to Make Harry Potter Cakesicles
Yield: 12 pops | Prep Time: 10 mins| Freeze time: 25 mins | Total Time: 35 mins
Ingredients and Equipment
- 1 cup cake pop dough (options below)
- 1 cup blue, black, yellow, green, red, or white colored candy melts
- 1 tsp coconut oil per color
- Harry Potter sprinkles
- Popsicle sticks (I used reusable acrylic cakesicle sticks)
- Piping bags
- Silicone molds (these are the ones I used)

Directions
Options To Make Cake Pop Dough:
Option 1: Food Processor
- Break up large chunks of pre-baked cake or cake scraps
- Start blending on the thick setting and low speed for about 1-2 mins. Stir the cake to make sure the large pieces are broken up.
- Change the setting to thin and the speed to high.
- Mix for 1 minute and stir.
- Pulse a few times to really break up the cake.
- Add 1 tbsp of water, mix on thin and let it go for about 2-3 minutes.
- Add one more tablespoon of water and hold the top cover.
- Mix on thin setting/high speed for about 30-45 seconds. The cake will form a dough.
Option 2
- Break up the cake into crumbs using a whisk or large spoon. Add a small spoonful of icing and mix for several minutes until it forms a dough.
*Both options form a cake pop dough; the food processor option will have a much nicer crumb and hold its shape more than the icing version.
Step One
Melt one color of the candy and 1 tsp coconut oil in 30-second increments. Stir every 30 seconds.
If there are still lumps after 60 seconds, heat for additional 15 seconds and stir out any lumps.
If using more than one color, repeat for the other colors.
Step Two
Pour the candy into the mold. Spread candy up the sides of the mold.
If more chocolate is needed to cover the center, make more using the same process as above.
Step Three
Slide in the popsicle sticks to the center of the molds.
Freeze for 15 minutes. When placing the molds in the freezer, it needs to be flat and the sticks cannot be pointed down inside the chocolate; they should hover above it.
If the stick won’t stay inside the dough, remove it from the mold, dip in the melted chocolate and insert into pop. Let stand for 10-15 minutes.
Step Four
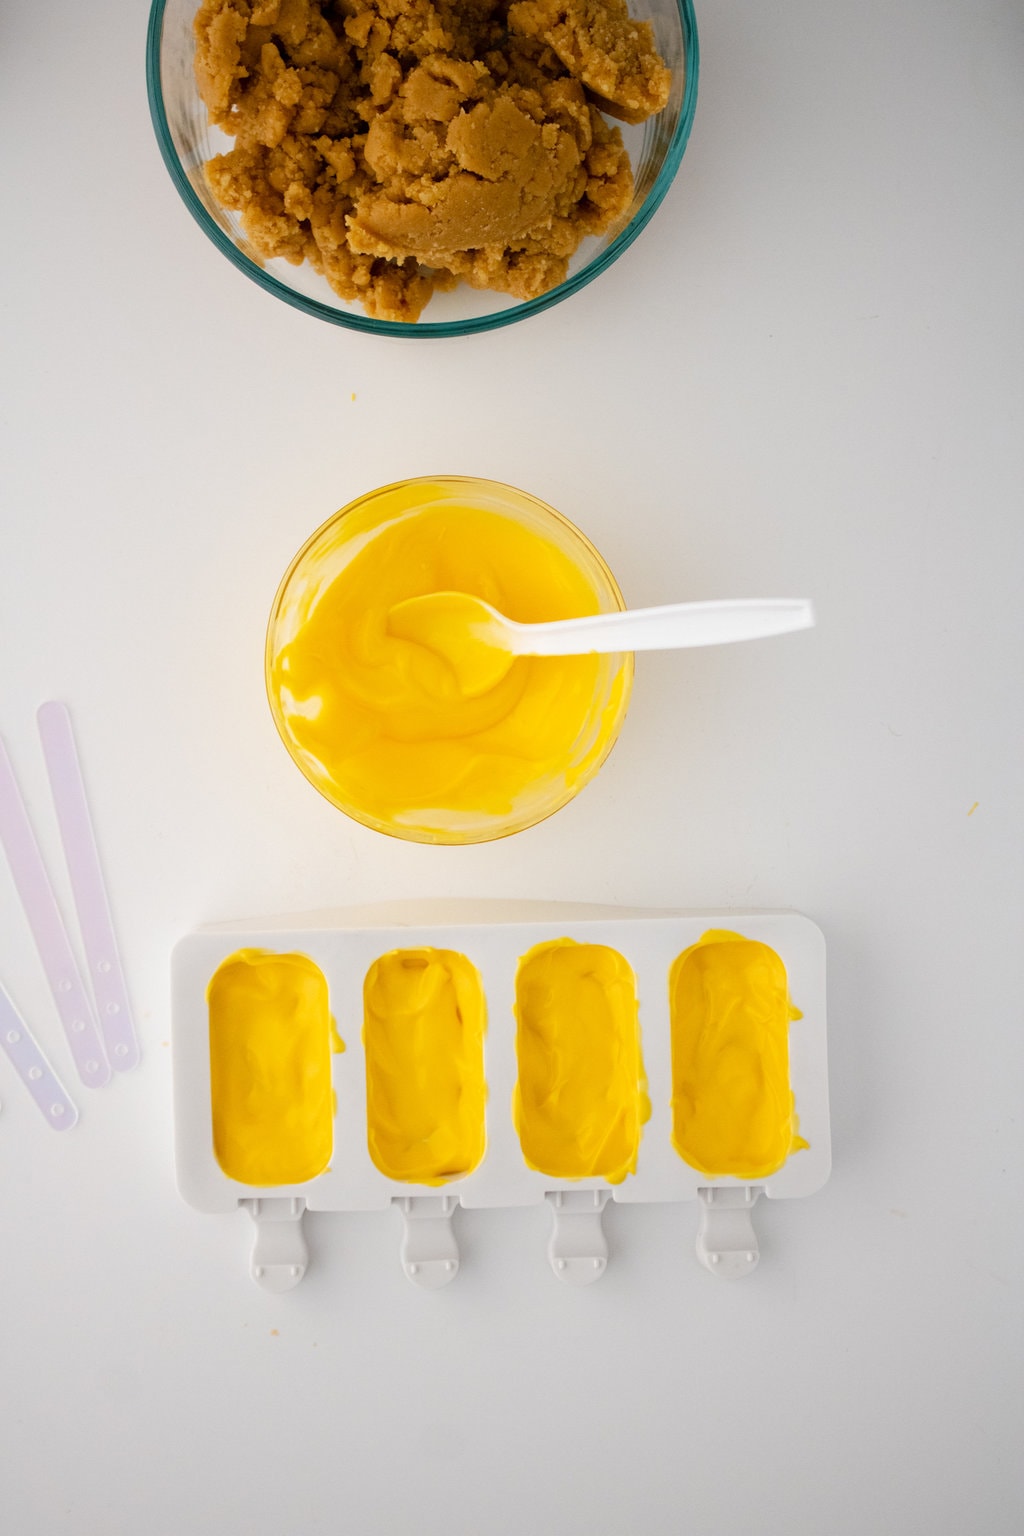
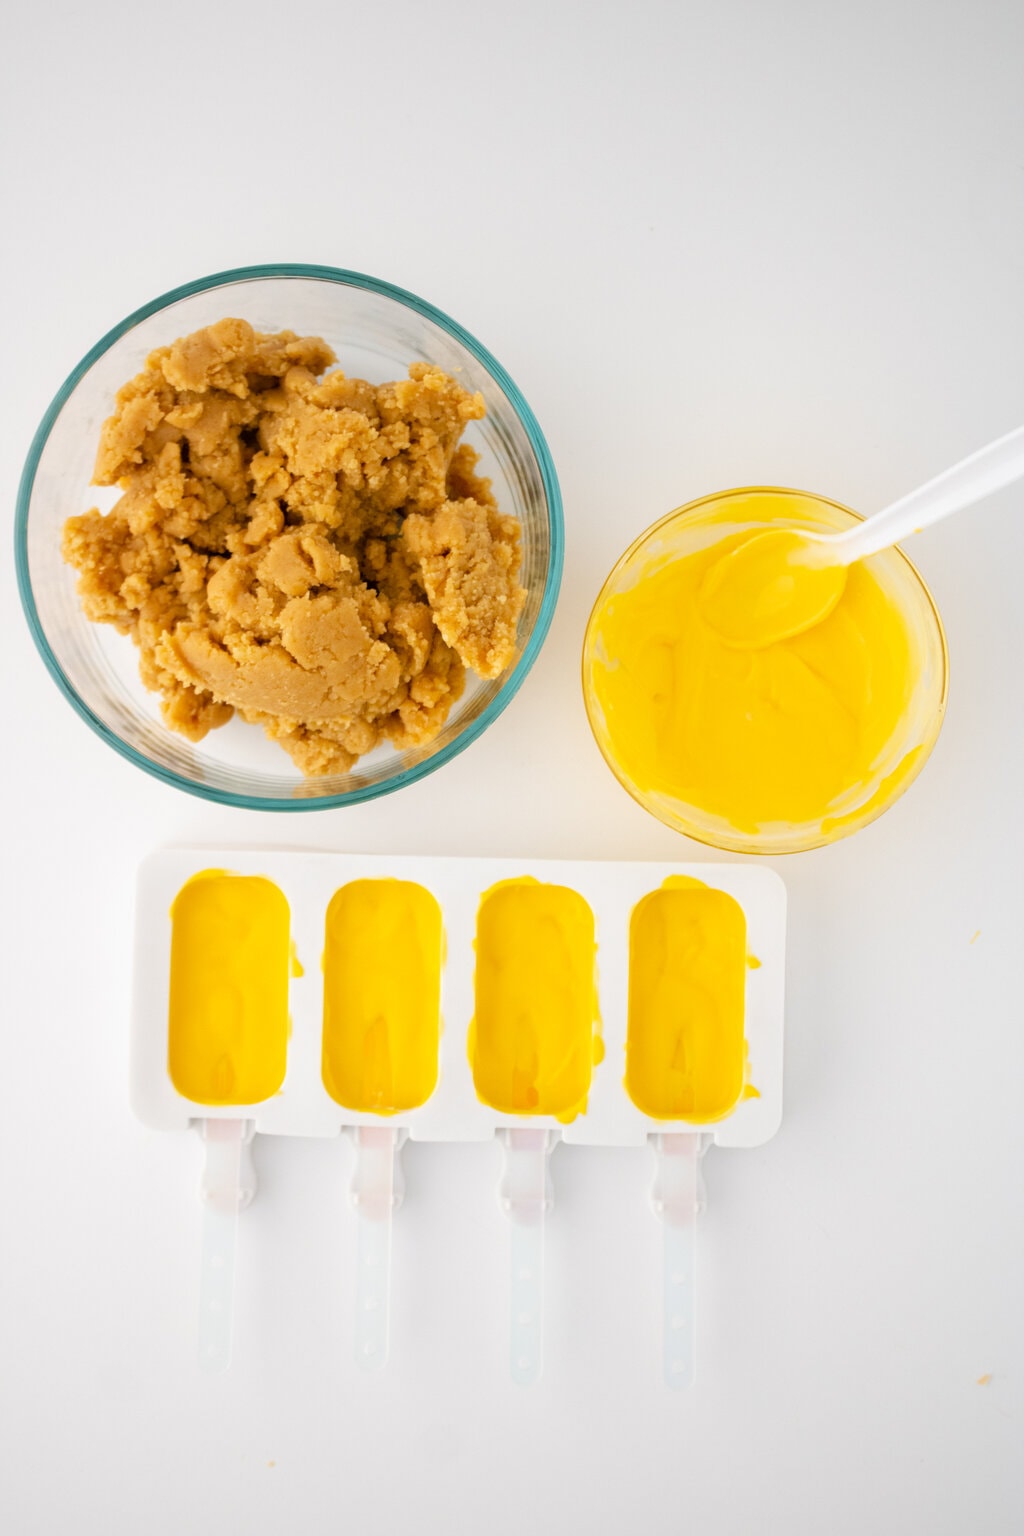
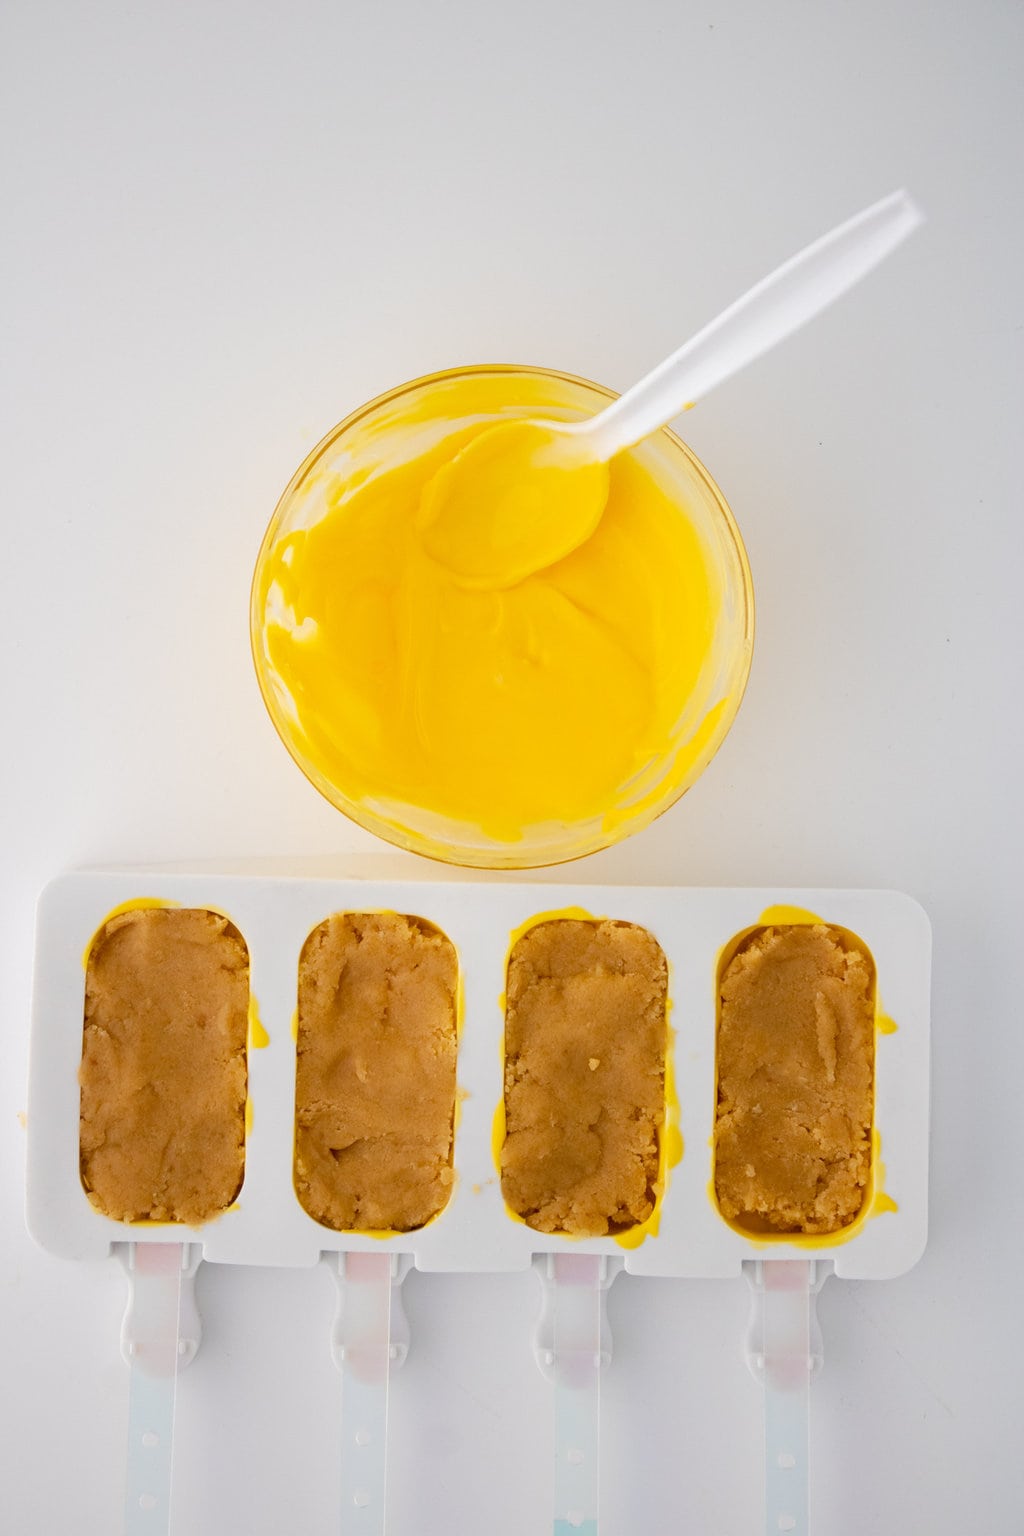
Remove the trays from the freezer.
Add the cake pop dough to each mold. Be careful not to overfill the cavity.
Gently press the cake dough into the mold being careful not to break the chocolate.
Step Five
Cover the backs of the cake pops with melted chocolate. Clean up the eges as much as possible.
Freeze the molds for another 10 minutes to harden the chocolate.
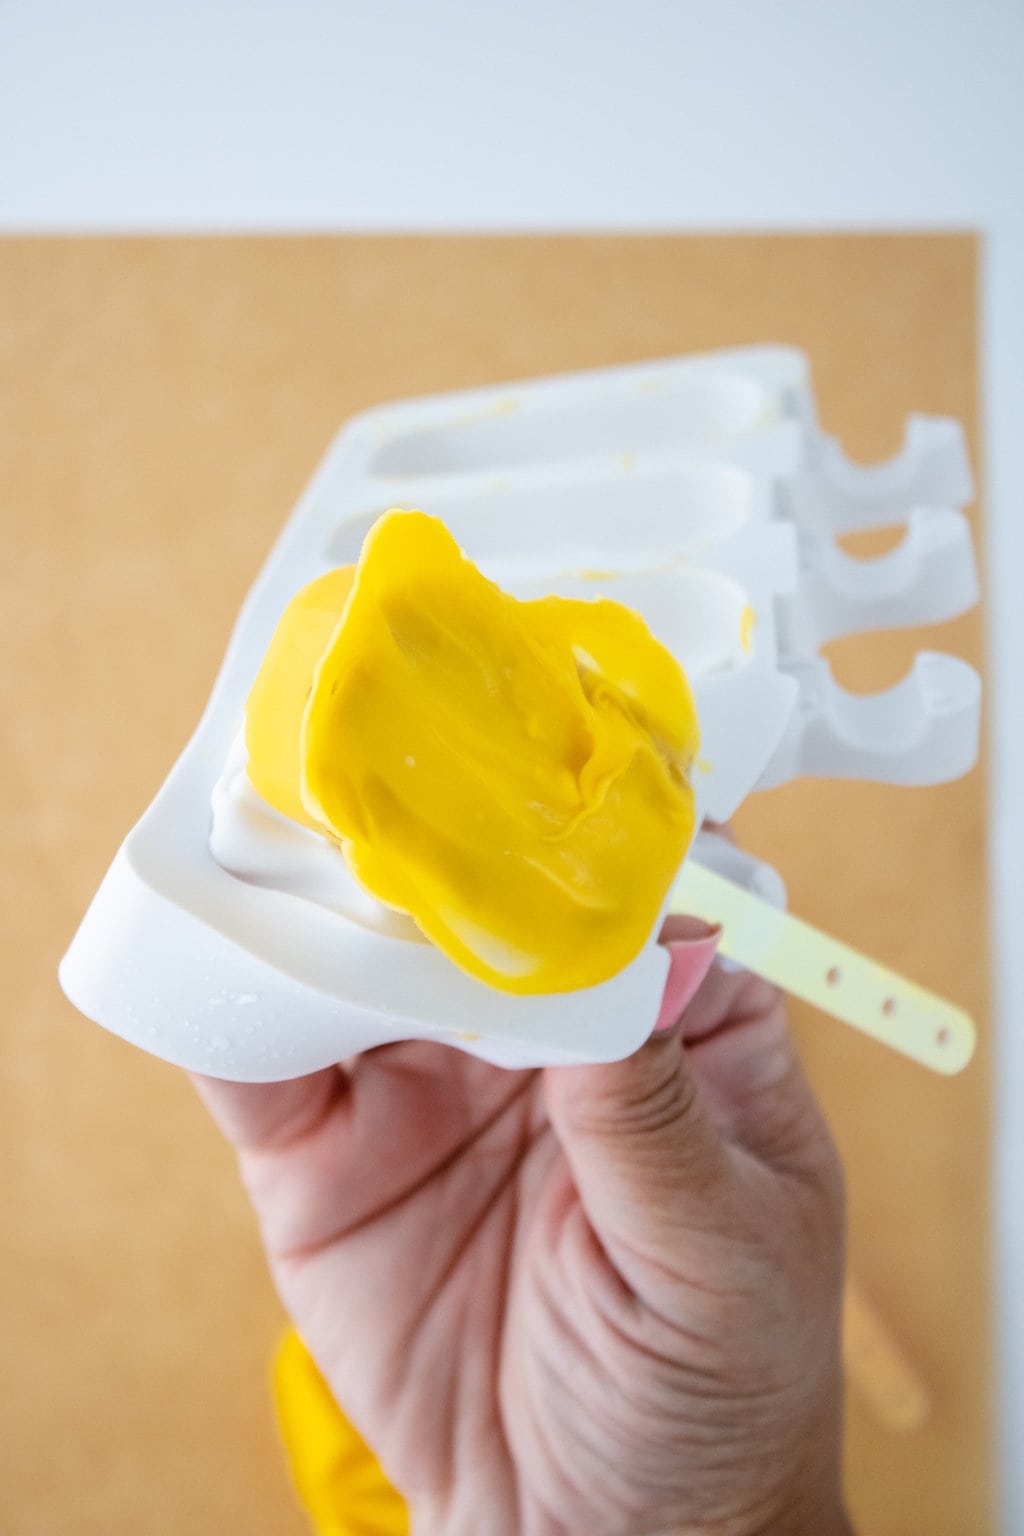
Carefully remove the cakesicles from the molds using the following method:
Very carefully loosen one of the end pieces. Peeling the mold from the top, very carefully peel the entire pop free. Carefully push the sticks up through the mold. Rest on a parchment-lined baking sheet.

If there is extra chocolate around the outer edge, use a pair of clean kitchen scissors to trim it off.
Melt additional colors of the chocolate, in the same method as above.
Once melted, add each color to a piping bag. Cut a small hole in the tip of the bag. Draw lines back and forth across the top of the cakesicle.
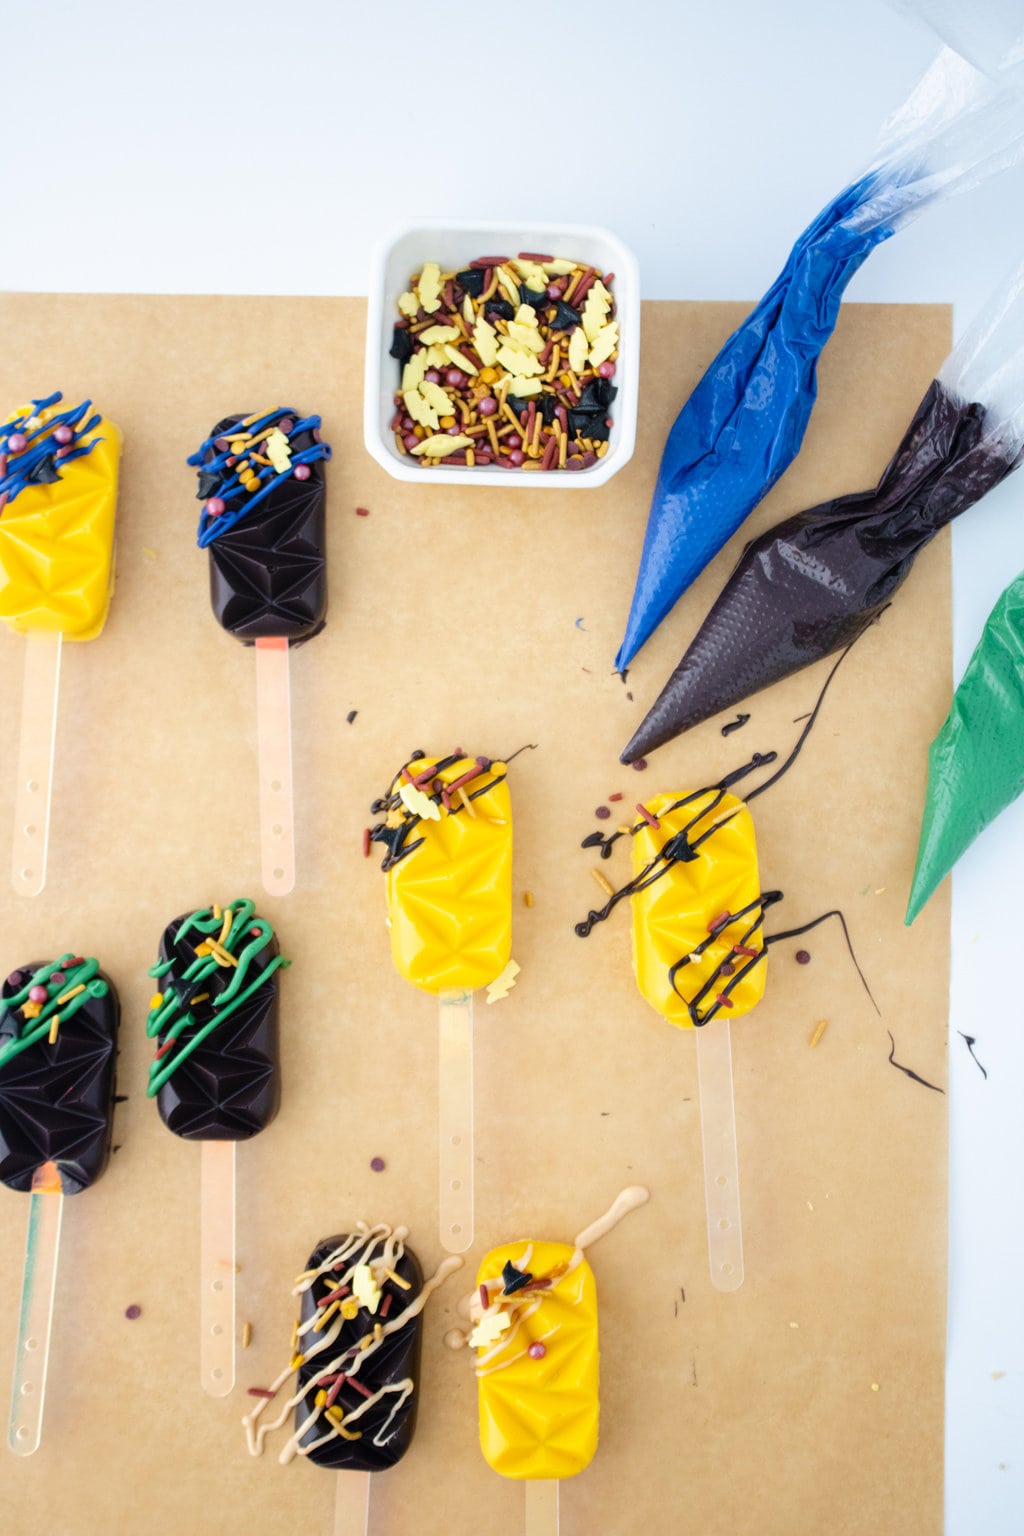
Add sprinkles immediately and let dry completely.
You might also like our quick and easy pumpkin pasties recipe that uses pre-made pie crusts and cooks up in 6 minutes!